BLAISDON PLUM & LAVENDER JAM
Thursday August 04th 2011, 4:04 pm

Just drove up the road to my house and the road side is lined with windfall plums, like a guard of honor greeting me back home. The plum thing round here is just about to kick off and I want to be ready to make the most of this abundant harvest. It’s on the doorstep and comes for free. I have written about Blaisdons, our local plum variety before and last year bottled them, see here . I also bottled squashed plums very simply, stoned and cooked in a light syrup. They were delicious and kept me in dessert for several months with custard, yogurt or cake. I need more of them alright, the larder needs to be well-stocked to take me through the winter.
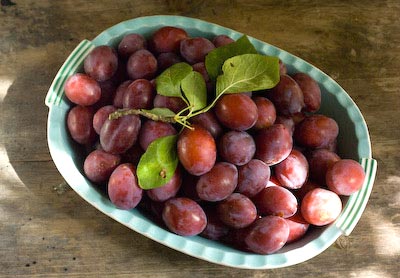
So to ease my way into the season I thought I’d start with a jam. I generally find plum jam quite uninspiring and one dimensional, so this jam called for the addition of careful thought to really make it sing. As I said on Facebook yesterday, good jam does not come from throwing everything in a pan and boiling like billio. That’s just stewing fruit and you end up with jars of sweet pink mush that somehow remain in the larder for years and that you are unable to ever get rid of. I want to make jam that is so fantastic that you quickly run out and vow you’ll make more next year. I like to macerate the fruit to draw out the juice and the fresh flavours and this method suits my way of life really well. It means you can begin to process your newly picked fruit at it’s freshest without having to get the jars and all the other paraphernalia ready. It gives you a day or two’s grace to get your head round the task in hand. You do need lots of bowls and in my kitchen and sitting room table-top space is often at a premium as bowls of fruit covered with cling film wait their turn, all topped and labeled with post it notes.
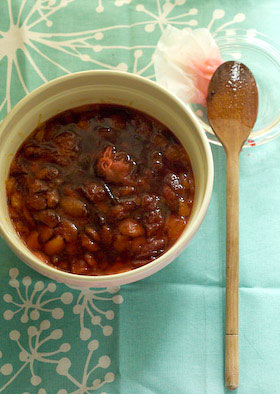
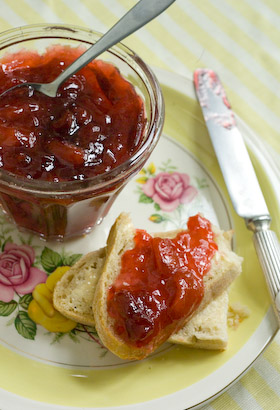
I mentioned in my last post that using lavender as a flavouring requires a light touch. It needs to be just present so it’s hard to put your finger on just what the flavouring is, to really work. This jam is delicious and is a brilliant colour too. The cooking time is kept to a minimum without too much sugar, so the plums have a tart edge to them, which any good jam should have in my opinion. I used lavender recently harvested from the garden, so though dry is also very fresh. Blaisdon plums are a cling-stone plum, so you either remove the stones after cooking them, filching them out one by one, or you cut the flesh from the stone. Some of my plums were windfalls so I needed to cut off any bruised and manky bits, so the second method, though time consuming, worked well in this instance. I have no doubt that as the season progresses, stone filching will become tedious. Right now I’m just loving the thrill of anticipation. Blaisdons – bring them on!
BLAISDON PLUM & LAVENDER JAM
Makes 1.125 kg (2lbs 4oz)
1.2Kg ( 2lb 8oz) plums or 1kg (2lb 4oz) when stoned
750g ( 1lb 12oz) sugar
juice of 1 lemon
1 Tbsp dried lavender
Chop the plums into quarters and remove the stones. Place the fruit in a bowl layered with the sugar, add the lemon juice and push the lavender, tied in a piece of muslin, down into the fruit. Cover and leave overnight to macerate.
Next day, pour the contents of the bowl into a pan and heat it through stirring until the sugar is completely dissolved. Bring to a simmer then remove from the heat, pour back into the bowl, push a piece of greaseproof paper down onto the surface of the bowl’s contents, then cover and leave to macerate for anything between 3 – 24 hours, whatever fits into your schedule.
If you plan to can or water process your jam, prepare your jars and seals, otherwise make sure your jam jars and lids are clean and hot by placing them in a warm oven for 20 minutes. Remove the lavender bundle, then with a slotted spoon remove the plum pieces from the syrup. There is no need to be too painstaking about this, it just means that your finished jam will have some nice chunks of plum flesh instead of it all being cooked into an homogenised mass!
Place the remaining syrup in a preserving pan, heat to boiling then maintain at a rolling boil until it reaches setting point. This took me about 10 minutes to achieve. Add the plum pieces and bring back to the boil and check for setting point again. Pour the jam into hot jars and seal. If you are canning your jam, process for 10 minutes then remove from the canner. Leave till cold, then test the seals. Label and date your jam.
TIME TO PICK LAVENDER
Thursday August 04th 2011, 12:02 am
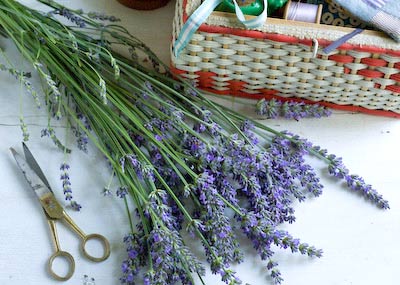
The other day whilst walking back from the preserving garden I suddenly caught a whiff of lavender on the breeze. Looking to the house alongside me, I could see through to a garden where there were two long hummocks of the stuff, running the whole width of the lawn, all in full spikey bloom and an intense shade of purple. The bees were having a field day. It was well worth stopping to breathe in another purposeful whiff before going on my way. Lavender is in flower so fleetingly, and it reminded me to harvesting some to dry for the linen drawer as well as some for culinary use. As a little goes a long way, plants in the garden at home, though nowhere as lush as those I had passed, would yield quite enough for drying without leaving them noticeably shorn.
It isn’t a crop that requires much in the way of pest control so is easy to grow organically. All the better for flavouring ice cream, buttery biscuits and cupcake icing. But a lightness of touch is most definitely required, as you can easily have too much of a good thing and end up with an overpowering medicated result. The flavour needs to be just there but hardly discernable, so getting the balance precise can be tricky. True lavenders, such as Lavandula augustifolia, including the popular Hidcote and Munstead varieties, are best for this, whereas the lavender hybrids called lavandins, bred especially for their oil are best avoided, as they are more likely to leave a strong camphorous aftertaste if used to flavour food.
Ideally picked on a dry sunny day when the flowers are just on the cusp of bursting open, you only need to tie a bunch together with string and hang it upside down, somewhere dry and shaded for the flowers to dry out in no time. When completely dried through, just crumble the brittle flowers away from the stems and store them in a sealed jar alongside your other herbs and spices. You could then use some to make my lemon, fig and lavender marmalade, which is featured in my friend, Canadian writer and canner, Sarah B Hood’s new book We Sure Can available in the UK from September. I’ve also just made some Blaisdon plum and lavender jam, which has been a big success, so i will post that recipe next to encourage you on your fragranced journey.
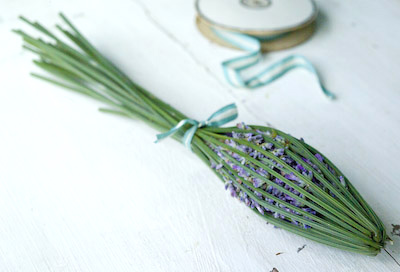
I thought I’d show you another traditional way to store a bundle of lavender, for scenting linens, where the flowers are encased in a cage made from the flower stems woven with ribbon. Called a lavender bottle, made this way, the flowers stay put and don’t go all over the place, so it can be pushed in between layers of stored bedlinen, kept in a drawer with your smalls or hung in the wardrobe to keep your best clothes sweet. For this the lavender variety is immaterial, the smellier the better.
Again pick your lavender on a dry sunny day when the flowers are just about to be or are partly open. The stems need to be long, green and pliable. Pick an odd number of stems, I used 21 here, and bundle them together, so all the flowers are bunched up together and the stems are smooth, pulling off any smaller flowers lower down. Tie tightly together below the flower heads with a piece of thin ribbon or twine. Then one by one, bend the stems back over the flowers so they form a cage around them. You do have to try and arrange the stems as evenly spaced as possible to keep things as neat as you can at this stage.
Tie a piece of ribbon or twine tightly around the stems to hold everything in place. Now, take a long length of narrow ribbon, 5-10mm (1/4-1/2in) wide is ideal, and starting at the top pointy end, wrap one end of the ribbon around one of the stems and fix it in place with a few stitches made with needle and thread. Begin to weave the ribbon in and out of the stems (you may find a bodkin useful to help with this), working round the stem cage and pulling the ribbon evenly to give the lavender bottle a good shape. When the flowers are completely encased by the woven ribbon, tuck the end of the ribbon around a stem and fix in place with a few stitches with needle and thread. Trim the stems to the length you like then tie the stems tightly together with ribbon at both ends. Leave the bottle to dry out for a while and give the flowers a squeeze from time to time to reactive the scent.

Another fab way to scent bedlinen and clothing is to spray them lightly with lavender linen water whilst ironing or just before you put them freshly laundered into the linen or airing cupboard.


