ONIONS WITHOUT TEARS
Thursday March 18th 2010, 12:11 am
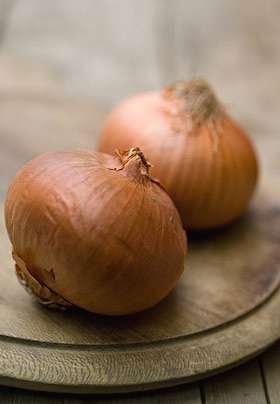
Month three Tigress’s can jam canning challenge and the chosen ingredient covers a multitude of choices, as anything classed as an allium fits the bill. I intended to post about pickled wild garlic but with the deadline looming and this post ready to roll, I’m running with pickled onions instead. The wild garlic, almost completed, will follow after.
I’m really more of a jam and chutney person but the Tigresscanjam challenge is giving me reasons to explore things I want to know more about. Pickles aren’t something I’ve developed much of a taste for and I hadn’t thought that they figured much in my upbringing. Then I remembered an onion and vinegar condiment, served at my grandparents house when I was little, as an accompaniment to Lancashire hotpot. It was made very simply of chopped raw onions marinated in malt vinegar, simple as. Never a great meat eater, I recall especially looking forward to this onion relish, eaten with the delicious sliced potatoes that were part of the hotpot.
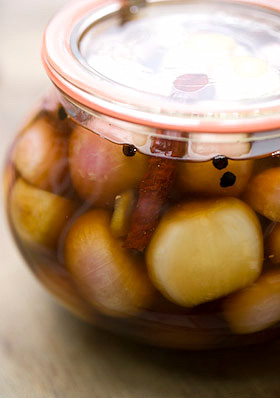
My cousin Jackie, an ex-Blackpool landlady who can rustle up a mean Lancashire hotpot, told me that this onion relish is the traditional companion to this regional speciality along with pickled red cabbage. Though I have no recollection of ever being served pickled cabbage as a kid, knowing this makes me pleased that pickling is part of my own heritage too, something I’d managed to forget about until the canjam challenge got me thinking. Then last week I found this onion-shaped Weck preserving jar in a charity shop, so filling it with pickled onions seemed perfectly appropriate.
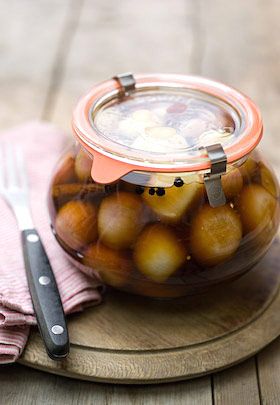
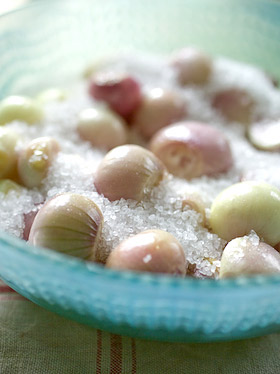
Pickling has to be one of the easiest things ever. I’ve chosen to make a sweet pickling vinegar using traditional malt vinegar with added brown sugar, honey plus a few spices. Pickling vinegars are really delicious and give plenty of scope for experimentation. Any leftover vinegar can be turned into salad dressings or be drizzled on your chips. The shallots need to be salted at the beginning to draw out excess liquid, which will help the onions to retain their crunch. I have hot water processed my jar of pickles to meet the criteria of the challenge, give myself more practice at canning and to use the jar in the way it was intended, but pickled onions are a pretty safe bet without that palaver. The processing makes them extra safe.
SWEET PICKLED ONIONS
Fills a litre (quart) sized jar
750g (1 1/2lbs) shallots
50g (2oz) salt
.5ltr (1pint) malt vinegar
100g (4oz) soft brown sugar
100g (4oz) honey
1 tsp peppercorns
1 dried red chilli
1/2 tsp mustard seeds
5cm (2in) piece of cinnamon stick
2cm (1in) cube of fresh ginger sliced
Pour boiling water over the shallots, leave them for a few minutes, then drain and rinse with cold water. Remove the skins and place in a glass bowl, sprinkling the salt in layers over them. Leave overnight, then rinse and drain them before packing into the hot sterilised jar.
Place the vinegar and the remaining ingredients in a pan, stir over a medium heat to dissolve the sugar and honey, then bring to the boil. Pour over the onions to cover, pushing the chilli and cinnamon stick between the shallots on the outside of the jar, leaving 1 – 2cm (1/2 – 3/4in) headspace. Seal with the lid and process for 15 minutes in a hot water bath. For more info about how to hot water process, refer to the guide here. You could use 2 500ml (1 pint) sized jars instead, in which case you only need to process them for 10 minutes. Once cooled store the pickled onions for 4-8 weeks before eating.
AND YOUR POINT IS….?
Friday February 19th 2010, 4:22 pm
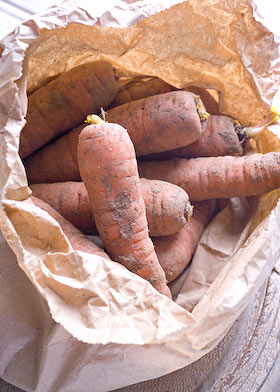
Month two, Tigress’s can jam canning challenge, and the ingredient to grapple with is ‘carrots’. They aren’t in season in the UK, not as a freshly pulled from the ground seasonal veg at any rate, otherwise I would have found some of those trendy purple ones to work with, or a nice bunch with their greenery attached that would have made a lovely picture tied in a bundle with garden twine. So a brown paper bagful of locally-grown and stored organic specimens is my starting point.
There is one good thing about it, I’ve learnt a lot since ‘carrots’ was announced. I wanted to find a recipe suitable for canning that needs carrots instead of just includes them, so I trawled through my extensive collection of books on preserving. I felt sure I would unearth a war time gem, thinking carrots would have been used more as a sweetener in times when sugar was scarce, but nothing turned up. I didn’t want to simply bottle carrots for the sake of it, couldn’t find a suitable pickle recipe, was about to adapt a Madhur Jaffrey recipe for quince and lemon chutney (by adding carrots) then forgot and cooked my last quinces. I was tempted by my trusted and much loved ‘Let’s Preserve It’ by Beryl Wood, a little jewel of a paperback from 1970 which contains 579! recipes, including a carrot chutney, a jam, 2 marmalades as well as a recipe for spiced carrots. but eventually settled on combining carrots with rhubarb in a jam.

British forced rhubarb is just starting to appear for sale. The season for forced rhubarb, grown in the ‘Yorkshire triangle’ begins January through to April, when field grown takes over. My head has been full of rhubarb all month as I am sorting out which varieties to plant on my allotment. Rhubarb alone is fantastic, so I just hoped that the inclusion of carrots in the recipe would be a wonderful addition rather than just meeting the canjam deadline. I’ve also added some chopped stem ginger and candied peel as I have some candied melon slices left over from baking at Christmas, so it has been a good opportunity to use some up. I recommend you use good quality candied peel for this, usually sold in chunky pieces from a deli or health food shop, rather than that ready chopped stuff in tubs surrounded by gloopy syrup you find in supermarkets.
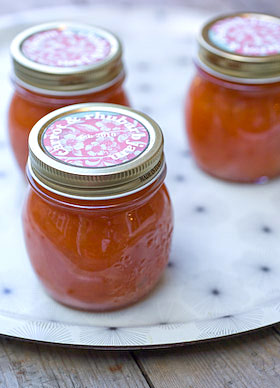
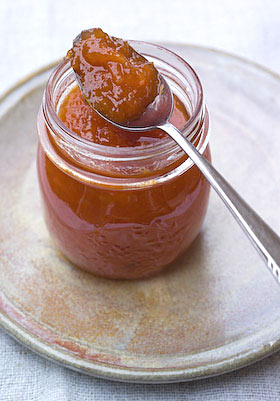
I did have to watch that the jam didn’t burn whilst I was boiling it to a set. As it cooked it turned to a beautiful deep orangy-red gelatinous consistency but it spat as it boiled. As both carrots and rhubarb are lacking in pectin, it is probably advisable to use jam sugar with pectin added or add extra pectin if you want a good set. I used half ordinary white sugar and half jam sugar, because I had some needed using up. What I have ended up with is quite a soft set but the taste is amazingly good. The recipe uses enough carrots to be ‘useful’ from the ‘using up a glut’ perspective and the jam isn’t overly sweet, so it makes perfect sense for canning. It would be ideal as a filling for jam tarts or Tigress’s thumbprint cookies or to fill a larger pastry case with the addition of an egg beaten into it then baked in the oven to set. A slice served with cream or mascarpone flavoured lightly with some ginger syrup from the stem ginger jar would work perfectly. All in all, it has been an unexpected success.
CARROT & RHUBARB JAM
Makes approx 1.5Kg (3lbs 5oz)
500g (1lb 2oz) carrots, peeled, topped and tailed
500g (1lb 2oz) rhubarb, washed and trimmed
1 unwaxed lemon
800g (1 3/4lbs) sugar (use jam sugar with added pectin for a stronger set)
60g (2oz) stem ginger (approx 4 balls)
150g (5oz) candied peel (any citrus or melon will do)
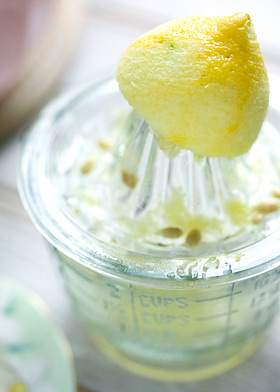
Finely grate the carrots and place in a pan with 500ml (3/4pt) of water. Finely grate the zest from the lemon, squeeze out the juice and place to one side. Chop the lemon halves, pith and all, into chunks and place them and any pips in a muslin bag tied closed with string or a knot and add them to the carrots. Bring to a simmer and cook with the lid on for 20 minutes, then remove from the heat.
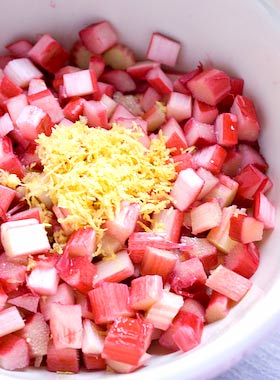
Chop the rhubarb into 1cm (1/2in) sized cube pieces. If the sticks are thick I slice them lengthways once or sometimes twice before chopping into equally sized small chunks. Place the rhubarb in a bowl, add the lemon zest and juice and pour the sugar over it. Cover and leave for an hour or two until the juice starts to run from the rhubarb.
Tip the contents of the rhubarb bowl into a preserving pan and add the cooked carrots, cooking liquid and muslin bundle. Add the finely chopped stem ginger and candied peel cut into thin slivers. Heat slowly, stirring all the time until the sugar is completely dissolved, then turn up the heat bring to a rolling boil and cook until setting point is reached (this took me around 25 minutes). (Test for a set on a cold plate or use a jam thermometer.) Discard the muslin bag.
Pour into hot sterilised jars, leaving 1 – 2cm (1/2 – 3/4in) headspace, screw on the lids to fingertip tight and process for 10 minutes in a hot water bath. For more info about how to hot water process your preserves, refer to the guide here. Leave your jars until cold and don’t forget to label and date them.
LOST IN TRANSLATION
Friday January 22nd 2010, 6:15 pm
When I was a kid, my friends aunt, who was some sort of food scientist, told me that if you looked at an apple with a bad patch on it, under a microscope, you would see that the badness goes far beyond the brown bit, like spreading mycelium or the roots of a plant. This information was told as a warning, to not think it enough to just cut away the bad part and eat the rest, as what lurks beneath unseen might kill you! As I say, I am recalling a childhood memory here to dramatic effect.
Needless to say, I have always remembered this advice yet always chosen to ignore it. I was brought up to be made of sterner stuff. I follow a scale of food offness of my own design and ‘it hasn’t done me any harm’. I know that there are others whose standards in this regard are much higher than mine and just in case you are by now doubting my credentials and casting aspersions on my forthcoming artisan preserve venture, I do have an official food hygiene certificate.
For 2010, I, along with around 130 others, am taking part in Tigress’ Can Jam Challenge, an idea devised by fellow US based blogger tigressinajam, (see also tigressinapickle). The idea, to choose a different seasonal ingredient each month that can be canned. You can read the challenge outline here. It is all about ‘canning’. In the UK we don’t ‘can’ anyway, we ‘bottle’ and even that is a niche activity. Bottling, in case you don’t know, is a way of preserving food in special glass jars by employing either a hot water bath on the cooker hob or an oven method so the foodstuff is rendered sterile and will thus store in your larder for ever more. Bottling was once popular in the UK, especially during the wartime ‘make do and mend’ era. It went right out of fashion with the advent of the freezer but now seems to be making a come back with the move back to home grown fruit and veg and other eco considerations. As I am keen to know all about it, even though I am generally of the ‘scrape any mould off the top then eat the jam beneath’ school of thought, I intend to embrace the challenge and run with it.
As regular readers will already know, I am a passionate jam, chutney and pickle maker, all activities which in the US seem to come under the canning umbrella but that here somehow don’t. Basically putting your preserves through this canning process will make doubly certain that they will keep and not become contaminated. Canning requires the use of special Kilner jars (or Mason Ball jars in the US) which need new seals every time you use them. These traditional style jars, invented in 1842, have recently been reintroduced and I sell them in my shop. Unlike in the US, you can’t buy complete canning kits here with all the bits and bobs you need to get started, but you can buy some of the equipment, the rest you have to improvise. Anyhow, as the year unfolds I will be able to write about what I discover.
In order to meet the criteria of the challenge, it does mean that any preserves I make must be processed in a hot water bath, or at least I must say they are! Have you lot in the States not heard of the cellophane circle and elastic band method of sealing your jam?
January has a citrus theme. It must be wonderful to pick your ingredient straight from the tree, as some of the other challenge participants are able to do. I had to buy my fruit as none is grown here. Here is my first recipe for the 2010 Tigress’ Can Jam Challenge.
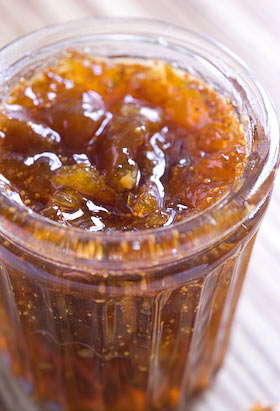
LEMON, FIG & LAVENDER MARMALADE
I am a massive fan of traditional bitter seville orange marmalade and this marmalade is just as tangy and fabulous. The lavender note adds an unusual flavour but isn’t at all over powering or over flowery. A few words first on ingredients; choose lemons that are organic where possible and unwaxed always, for this preserve. I had trouble finding dried figs without a load of gloop surrounding them, as they seem to be sold like this in supermarkets for ready-eating. Eventually I found some really nice dried Lerida figs in the health food shop. Dried lavender can vary a lot. I sell Snowshill lavender, grown in Worcestershire, sold by the scoopful in my shop and it is highly scented and natural. If you can’t find one with a good fresh scent, then please just leave it out; if you use it, it wont bring anything useful to the party.
Makes 1.3kg (3lb)
5 unwaxed lemons, approx 600g (1lb 5oz) plus 1 other lemon
400g (14oz) dried figs
25g (1oz) dried lavender
1kg (2lbs 4oz) sugar
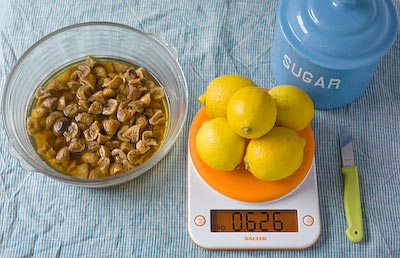
Heat the oven to 180C/ 350F/ Mk 4. Wash the 5 lemons and place in a lidded heat-proof casserole with 650ml (1 1/8pts) water, so the fruits just begin to float. Bring to a simmer, put the lid on and place in the oven to slow cook for 2 1/2 to 3 hours.
Remove the stalks from the figs and chop them into 1cm (3/8in) sized pieces (or smaller or bigger as you like, remembering they swell up as they reconstitute). Place in a preserving pan with 650ml (1 1/8pts) of water and leave them to soak while the lemons are poaching.
Remove the casserole from the oven and lift the lemons carefully with a slotted spoon out of the liquid into a sieve placed over a bowl to catch any drips. Leave them till cool enough to handle then cut each lemon in half and scoop out all the innards, collecting all the pulp and pips in a piece of muslin. Tie the muslin into a bundle and add to the preserving pan along with the poaching liquid and any liquid collected in the bowl. Chop the lemon skins finely into strips and keep on one side. Tie the dried lavender in another piece of muslin to make a bundle and add that also to the pan. Bring to the boil and simmer for 20 minutes.

Take off the heat. Remove the pulp and pip bundle and add the chopped lemon peel as well as the juice from the remaining lemon, passing it through a sieve to remove any pips if necessary. Add the warmed sugar and stir until completely dissolved then heat, bringing the pans contents to a rolling boil and test for a set after about 10 minutes and every 3-5minutes after that until setting point is reached. If you haven’t ever done this before this means that a blob of the syrup on a cold plate will readily form a skin that wrinkles when you push your finger across it. Take the pan off the heat whilst testing.
Turn off the heat, remove the lavender bundle and leave the jam to rest for 15 minutes then stir to distribute the pieces evenly before pouring into hot, clean, sterilised jars. Seal with either waxed paper discs and jam pot lids or the bottle seals and screw tops if intending to hot water process, in which case place the jars in the water bath and process for 10 minutes. For more info about how to hot water process your preserves, refer to the guide here. Leave your jars until cold and don’t forget to label and date them.
