THE BIG AUTUMN BLANKET WASHATHON
Wednesday September 01st 2010, 5:46 pm

Today is a gloriously sunny day but it doesn’t fool me. We’ve already had a few nippy evenings, sent to prepare us for autumn ahead. Hopefully, we’re due a good September weatherwise but Autumn’s coming whether we like it or not. So as well as lots of canning projects over the next 2 months to stock up the store cupboard (more plums, damsons, apples as well as pears, quinces and all the hedgerow berries to look forward too), I’m also trying to get a few other jobs done to make life warm and cosy. I really must replace the fire bricks in the Rayburn soon, it’s no good leaving it till the weather has already taken a turn for the worse. There is a box of them beside the Rayburn, been there since last year. And I need to get the chimneys swept.

I intended laundering all my blankets in the spring, but didn’t get around to it, so today resolved to make a start. I love blankets and as you can see, once they are collected together, I have quite a few. Vintage Welsh blankets are my favourites, the weaves and colours are just wonderful. So first I piled all the blankets up so I can work my way through them, washing them one by one, restoring them, to their pristine glory ready for colder months ahead. I have 5 cats so my house consists of lots of cat beds, in fact it is lots of cat beds all joined together. The blankets collect fur as well as dirty wet paw marks.
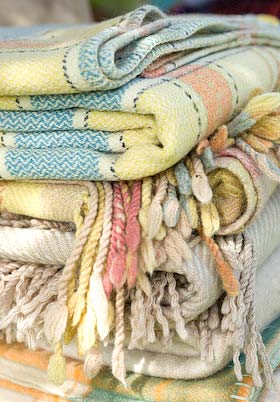
I have on occasions washed blankets in the washing machine with sometimes good, sometimes disastrous results. I’m not prepared to chance it with any of my precious blankets. They are all pure wool and some feel more robust than others. If your blankets say on the label to wash in the machine, then you’ll be fine. Don’t think any of mine have labels so common sense is the best approach. Once wet, they become big heavy unwieldy things to handle so you do need a bit of muscle and a cup of tea and a biscuit (or a prize winning scone perhaps!) every now and again.

HOW TO WASH A BLANKET
Give your blanket a good shake out doors. If like mine, they have animal hairs on them, it is a good idea to run the hoover over the hairy bits, holding it taught as the suction of the nozzle removes the excess. If your blanket has any stains, these will need to be dealt with as appropriate for its type. A good old fashioned bar of soap rubbed into the stained area will sort out most stains, but dried blood or grease marks may require a product designed specifically for that job. Don’t rub the area with too much gusto otherwise it could felt the surface of the wool.
If your blanket is too large to fit in the sink use the bath. Fill the sink or bath with plenty of lukewarm water, so the blanket can move about in it, and add some soap flakes, Woolite or Stergene to give a good lather. Lower the blanket into the water and agitate it gently, working around the blanket but not rubbing it excessively. Remove the plug and allow the water to drain away and try and gently squeeze out as much excess water from the blanket as you can. This is where you need muscles. A washing up bowl or bucket is also useful here, as you can lift the blanket into it while you rinse out the sink or bath and refill with clean warm water for the first rinse. It is really important that wool blankets are not subjected to sharp changes in temperature to prevent felting, so try to keep the water at a similar lukewarm temperature throughout.
Rinse the blanket a couple of times in clean water until the water stays clean and shows no sign of suds. You can add fabric conditioner to the final rinse if you wish. Lift the blanket and squeeze as much water as you can from it. If you have a washing machine robust enough to take the wet blanket you can then spin it in the machine. If the blanket is too heavy for your machine you will need to fold the blanket, place it flat on a large towel and then roll the towel up so it soaks up the excess liquid from the blanket.
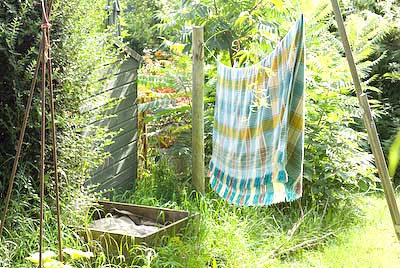
Hang the damp blanket on a washing line out in the fresh air and use plenty of clothes pegs to hold it straight and taut. Pull the blanket into shape so warp and weft threads run straight, giving any tight edges a gentle tug and stroke out any creases. A gentle breeze on a warm day is the ideal scenario so your blanket will dry quickly and be in great shape. If you have the time, move the blanket part way through its drying time and re-peg, that way you wont end up with a crease where it is folded over the line and it will prevent the pegs from making indented marks on the fabric. Your blanket should now be clean and soft as well as smelling as fresh as a daisy.
So that’s one blanket sorted. Only another 15 to go!

BOTTLING TOMATOES & THE ACIDITY CUSP
Monday August 16th 2010, 1:05 pm
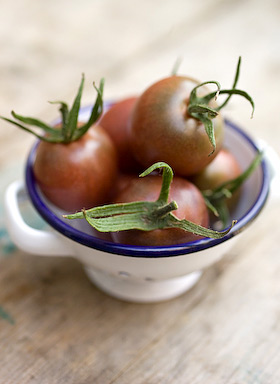
Month eight Tigress’s can jam canning challenge and for August the ingredient chosen by the inspired and inspiring Julia is tomatoes. My relationship with this ubiquitous fruit has been a checkered one. I hated tomatoes as a kid but learnt to tolerate them later on. I do like them as a sauce for pizza, applied with a lightness of touch though. I can now eat cherry tomatoes raw and, like biting into any fruit, appreciate their sweetness so I suppose you could say I’ve made progress.
But it is as objects of beauty that tomatoes especially come into their own. The resurgence of interest in growing heritage varieties has brought all these wonderfully coloured tomatoes to the fore; striped, heart and pear shaped, shaded like a shop display of lipsticks, from gold to chocolate. They are all so fantastically photogenic and worth growing for looks alone.
As an ingredient for canning, they are on the acidity cusp. Tomatoes require special attention for bottling safely using the water processing method or else should be pressure canned. They are only just on the acid side of neutral and acidity can vary for different varieties, so it is necessary to add a little more acidity in the form of lemon juice or citric acid to make sure they stay safely putt. It is important that time spent preserving has a very definite pay off later so it makes sense for me to bottle really useful tomato passata-type sauces for cooking up further down the line into pizza toppings, pasta sauces or as additions to winter casseroles.
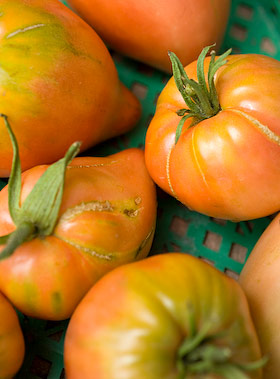
Each year I begin the growing season with high hopes for an extensive range of weird and wonderful tomato varieties. I don’t have a greenhouse so can only grow toms out in the open. We’ve had two consecutive years of blight bringing these plans to a soggy and disappointingly diseased halt, but this year the weather has been kinder. Tinned tomatoes are as cheap as chips, so I don’t think it is really cost effective to bottle tomatoes unless you have your own homegrown supply or you are able to mop up someone elses glut. The plants I have growing in the garden are still some way from the ‘glut’ stage. Thankfully my neighbour Jane has a greenhouse as well as green fingers. She sells her excess garden produce from her garden wall. Last week I picked up four generous punnets of yellow and red tomatoes from the wall and dropped my payment into the honesty box provided.
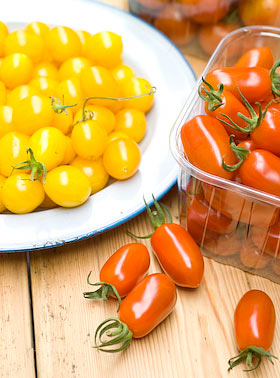
So first a basic tomato sauce. These cherry tomato varieties are as sweet as anything though perhaps not the most ideal kinds for bottling. For sauces, larger fleshy varieties like Roma and San Marzano are good. Skinning so many tiny fruits was definitely out of the question for starters. Tomatoes can be very watery, which means that they will require considerable cooking to reduce, thicken and intensify the flavour, unless some of the liquid is removed first.
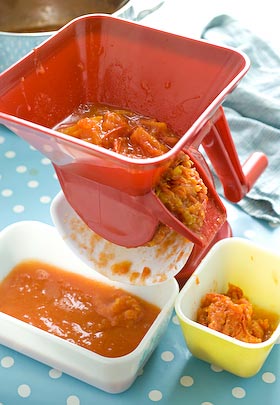
In order to give a fresher flavoured result with less cooking time I began by slitting each fruit and removing the seeds by running my thumb quickly through their middles, collecting the seeds in a sieve placed over a bowl. Any collected juice would come in handy later. After a brief cooking time of 10 minutes the de-seeded tomatoes were then processed using a passata mill, running it through several times to separate the skins from the pulp. The passata mill is a bit of kit I acquired some years ago when dreaming of a bounteous tomato crop that never materialised. The mill has sat unused in its box ever since so this was its first opportunity to prove its worth. I must say that I wasn’t too impressed. Passata-ing the tomatoes was a messy and annoying business (compounded by trying to take photographs at the same time). Tomato juice splattered all over the place and possibly it was my fault, but juice was squirting out the handle side as well! Next time I will most likely use my regular food mill over a bowl, which though still requiring patience would be less messy and more controllable. Depending on the scale of the project, to remove skins and any stray seeds you could simply push the tomatoes through a sieve if you prefer. Still too watery for my liking, I strained the flesh again briefly in a sieve collecting more juice to add to what had been collected earlier. 2.5Kg (5 1/2lbs) of tomatoes resulted in 775g (1 3/4lbs) puree and 750ml (1.3 pts) of juice.
HOW TO BOTTLE TOMATO PUREE
Prepare the water bath, jars and seals ready for bottling (canning). For more info about how to hot water process, refer to the guide here.
Put the pureed tomatoes in a pan and simmer for a short time to reach a consistency that suits you so excess juice has evaporated. If the puree is already thick enough simply bring to boiling point. I added 1 tsp sea salt (a non essential, so add salt to own taste or leave out all together) plus an aditional acidic booster. As a general guide you need to add one of the following to every 500ml (1 pt) tomato puree: 1Tbsp lemon juice or 1/4 tsp citric acid. I used balsamic vinegar instead, adding 2 Tbsp balsamic vinegar per 500ml (1pt) puree.
Place a basil leaf inside each jar against the glass and fill jars with tomato, leaving headspace required for your type of jar. Remove bubbles from sides of jars using a small spatula, wipe rims clean and seal. Process 500ml (1 pt) jars for 35 mins and 1ltr (quart) jars for 45 mins. Remove jars from water bath and leave till cold before testing the seals. Any jars with loose seals will require reprocessing or you can keep them in the fridge for using up within a few days. Remember to label all your jars before storing them.
My tomatoes made 2 x 350g (12oz) jars of sauce plus a bit more that I had with pasta for my dinner that evening.
WHAT TO DO WITH THE JUICE
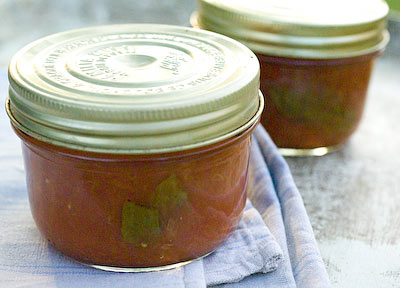
It seemed a shame to waste the lovely sweet juice collected whilst extracting the tomato puree, so I decided to turn it into tomato jelly. You could flavour tomato jelly with fresh ginger and ground coriander or finely chopped chilli. After much deliberation I eventually chose vanilla and white pepper for a jelly with a sweet / savoury crossover. This jelly is delicious on sourdough toast with cream cheese and I used it to fill tiny savoury pastry cases, topped with sour cream or crumbled goats cheese for a really exquisite little mouthful.
As tomato juice is lacking in pectin, a boost in the form of the addition of lemon or apple juice is helpful. Having bottled some whitecurrant juice several weeks earlier to use at times like this, I added some of that for its setting quality. Preserving sugar containing added pectin could also be employed here. Adjust proportions to suit what you have available.
TOMATO, VANILLA AND WHITE PEPPER JELLY
750ml (1.3 pts) tomato juice (a byproduct of making the puree above)
550g (1 1/4lb) sugar
Juice of 1 lemon or 150ml (2/3 cup) whitecurrant juice
1 vanilla pod, split and seeds scraped from inside
1/2 tsp ground white pepper
Prepare the water bath, jars and seals ready for canning. For more info about how to hot water process, refer to the guide here.
Pour the juice through a jelly bag, collecting the juice in a measuring jug. To every 600ml (1 pt) juice add 450g (1 lb sugar). Place all the ingredients in a preserving pan. Stir constantly over low heat until the sugar has dissolved then turn the heat up to bring to a rolling boil. Boil to setting point, (it took me about 10 minutes) when a blob of syrup on a cold plate will formed a skin when you push your finger over the top of it. If using a jam thermometer it will register 220F 105C. Remove the vanilla pod and fill hot jars, leaving the required headroom for their type. De-bubble the sides using a small spatula or chopstick, wipe jar rims clean, before sealing and placing in the hot water bath. Process for 10 minutes, remove from the bath, then leave till cold before testing the seals. Label and store.

The ratio of sugar to juice is the classic one used when making jellies. This jelly is very nice indeed but I will be tempted to cut down on the amount of sugar when I make this next. It is often safe to keep jams and jellies without hot water processing (canning) them. If you do can them you are making doubly certain that they will be preserved safely for a year or even longer.
GOT MY HEAD STUCK IN A RUMTOPF
Tuesday July 13th 2010, 9:57 pm
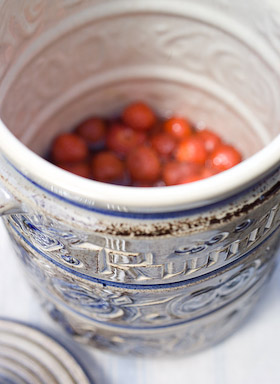
Tigress got the ball rolling back in June when she wrote about her plans to start a rumtopf using her new-fandagly fermenting crock. I don’t think I’m the only one she inspired to rumtopf-along with her, but first I needed a suitable jar. The only pots I’ve seen for making rumtopf have always struck me as hideous; big bulbous lumpy jars illustrated with fruits and the word ‘rumtopf’ etched on the front, the recipe is right there on the jar. A fermenting crock would be a very cool to use, but as they are hard to find and when found cost in the region of £80, one of them was way out of my league. I kept my eye on Ebay and eventually found a jar that I could live with. You can make do with a tall clip-top preserving jar instead if you like but I’m enjoying making my rumtopf in its own purpose designed container.
So the jar eventually arrived and it is definitely vintage 70’s. I peered inside and caught a glorious wiff. The jar was not only vintage but had been used before. I knew this as the lightly crazed inside had soaked up previous alcohol and fruit flavours. It smelt fabulous, fruity spirit with a hint of lovage! I couldn’t stop sniffing and shoving my head further inside to soak up the aroma. The jar is about head size, you could effortlessly slip your head inside whilst becoming mesmerised by this magical scent and the desire for more, but slipping it out again may not have been quite so easy. I stopped short of ending up in casualty with a rumtopf on my head. That would have been ridiculous but, come to think of it, would have ensured a mention in the Forest Review.
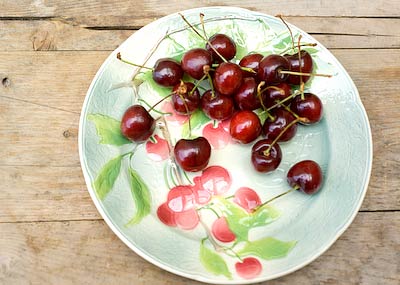
So what is a rumtopf? It is a way of preserving fruit in alcohol. You start it June – July time, add different fruits in layers as they come into season, throughout the summer and autumn, along with some sugar and enough rum or brandy to keep it submerged, and when it is full, about 6 – 8 weeks before Christmas, you then leave it till ready to devour at Christmas time. The contents can be decanted into kilner jars to give as gifts, the fruit can be eaten with cream or ice cream and the alcohol, which I understand is deceivingly dangerous, can be drunk as a liqueur or added to sparkling wine.
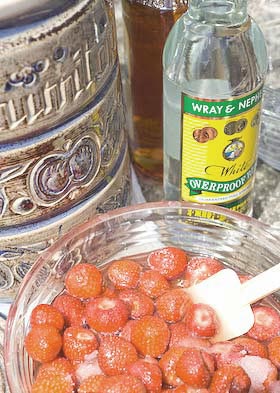
Most fruits are suitable with just a few exceptions; melon is too watery, the skins of blueberries and gooseberries go hard, bananas turn to mush, citrus fruits and rhubarb are a no-no. Traditionally you start with the first strawberries of the year, any amount between 250g – 750g plus half its weight in sugar. Remove the stalks and leave the fruit and sugar in a glass dish to marinate overnight and help release the juices before decanting it into the rumtopf jar. Pour rum or brandy over it until it is completely submerged, then find a plate or saucer that will fit inside the jar and push it under the alcohol so that the fruit can’t bob up to the top. I have read that the alcohol should be at least 54% proof and as spirits on general sale are usually around the 40% mark I had to seek out some overproof stuff. Asda sells an overproof white rum at 63%, so I mixed it, two thirds overproof to one third normal dark rum to get somewhere near the 54%, make the rum go further and give it a darker colour. I think this may be a mere detail and am sure that most people don’t go to so much trouble.
You continue to add more fruity layers as they appear; raspberries, cherries, nectarines, peaches, pears, plums, apricots and blackberries. Use any amount of fruit you have, adding half its weight in sugar each time and making sure to add more alcohol when needed to keep it covered. Cover the top of the jar with clingfilm and put the lid on top of that then leave it in a cool place out of the way to do its thing. If using a clear glass preserving jar, keep in a dark place as well. I’m up to my third layer of fruit so far but just can’t stop myself having a sniff everytime I walk by the jar.
WHAT DOES A SHAPE TASTE LIKE ?
Tuesday March 09th 2010, 11:43 am
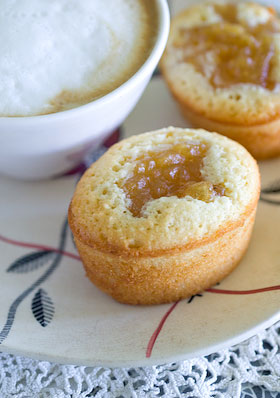
Yesterday was my day off, which just means that I have a list of jobs need doing that call for being away from the shop. With a list as long as my arm it is business almost as usual, but somehow calling it ‘my day off’ creates a whole different vibe, so long as I tackle the list, I can do what I like and pretend I’m on holiday. Even better, the sun was shining, as if spring was really here.
With no bread in for making toast I decided to rustle up some muffins or perhaps blueberry griddle scones to have with my a.m cappuccino. I opened the cupboard where the tins live and didn’t relish pulling everything out to locate the muffin tin at the back and then the friand tin fell out all of its own accord. So friands it was to be.
I have written about friands before here, and I know from the daily stats how many readers find my blog by googling friand related keywords. And no, I don’t know where you can buy a friand tin in the UK! Someone was selling them for a while, but sadly no longer and I regularly trawl the web trying to find them to sell at The Laundry as I’m sure that I could sell perhaps one a month (shopkeepers irony).
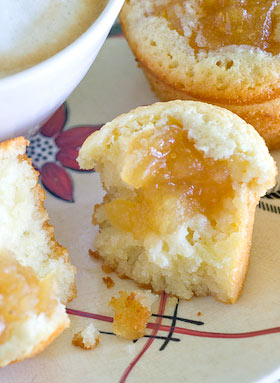
Friands are supposed to be oval shaped. Why the shape of a cake should be so important, I don’t know and I am sure that they will taste just as good baked in regular round shaped muffin moulds. Feel free to make them any shape you like. So for my day off I looked at the ingredients to hand; some whole blanched almonds left over from Christmas baking (which I ground to a rough meal in my old Magimix for this recipe), 1 bramley apple and a little bag of fresh bantam eggs, my neighbour leaves me each week, and decided to rustle up some tart bramley friands. The ground almonds make a lovely moist precious cake and this recipe is tangy, fruity but not overly sweet. Don’t forget, a friand is not just for breakfast, it isn’t really for breakfast at all, but hey, it’s my day off.
TART BRAMLEY FRIANDS
Makes about 10
1 medium sized Bramley apple or other tart variety
1 1/2 Tbsp soft brown sugar
1 1/2 Tbsp maple syrup
2 tsp vanilla extract
5 egg whites
125g ( 4oz) butter, melted
100g (1 cup) ground almonds
100g (3/4 cup) icing sugar or caster will do
60g 1/2 cup plain flour
Preheat the oven to Mk5, 190C, 375F and prepare a muffin tin by buttering the moulds.
Peel and core the apple and chop into small evenly sized pieces, then place in a small pan, sprinkling 2-3 teaspoons of water over it. Bring to a simmer and cook until it is soft and mushy, which only takes 3-5 minutes. Add the brown sugar, maple syrup and 1 tsp vanilla extact, stir and cook for another minute or 2. Add more sugar if you want it sweeter but a tart hit is what you are aiming for. Leave to cool.
In a large bowl, whisk the egg whites till just frothy. Add all the remaining ingredients and combine quickly to make a batter. Pour the mixture into the moulds, half filling them. Drop a heaped teaspoonful of the stewed apple into the centre of each friand. Bake for 20-25 minutes till risen and set and just starting to turn golden. Remove from the oven and leave to cool for 5 minutes before turning them out onto a rack to cool.
EVEN MORE OLD PEGS
Tuesday August 25th 2009, 10:44 pm

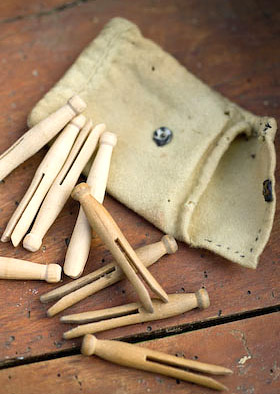
I was really pleased with the photographs of my old pegs that I posted a few weeks ago. Since then I’ve acquired even more. It is hard to believe that pegs could come in so many different styles, but the fact that they are all handmade by someone, once, and designed to do a necessary job makes them especially interesting to me. I don’t suppose they were ever considered as things to warrant attention.
The first set of pegs are quite large. They have been turned on a lathe as there are marks in the tops which show where they were attached for turning. I think they are oak but seem to have been stained to give them a rich woody colour.

The second set are again quite big, clumsy and chunky, hewn from untreated oak. The tops are square and have been thoughtfully bevelled at the corners, to make them more comfortable to handle when being pushed down onto the washing line.
The last set look like conventional dolly pegs but, though my photo doesn’t really convey it, they are child sized, each peg only 6cm long. They are like the first pegs given to me as a child by my Aunt Lily, who always gave the best presents and had an innate sense for what you’d want more than anything in the world. Whoever owned these little pegs hand stitched a flannel bag to keep them in. Small nimble fingers sewed on a press stud fastening to keep the pegs safe and tidy.
A PURVEYOR OF OLD TATT
Tuesday August 18th 2009, 5:08 pm

I’ve just been out on a little jaunt. Feeling haunted by thoughts of a kitchen cabinet, spotted on my wanderings yesterday but not purchased at the time I decided that £5 was a snip for this modest item with original 60’s patterned formica top, and so closed the shop for an hour to go and buy it. I would most likely have saved the cost of the cupboard in petrol money if I’d bought it yesterday – such is the folly of cost cutting mind games.

The cupboard was at my favourite second hand place in the forest, called Gorsty Knoll. I am in two minds as to whether I should make the name public, as I don’t really want the world and his wife trying to find it, but in a way, the name is as strange as the place, so I think it merits a mention. Basically, this second hand furniture dealer sells a load of old tatt; house clearance boxes, old cutlery that has seen better days and that was never up to much in the first place, divan beds and comfy but ugly sofas. There is always a big pile of broken furniture by the door, chairs missing a leg and bits of rusty old bedsteads.
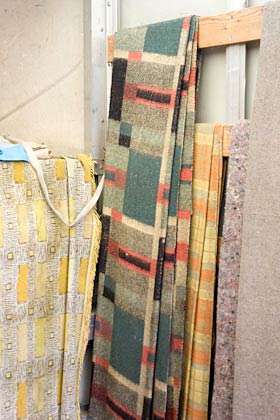
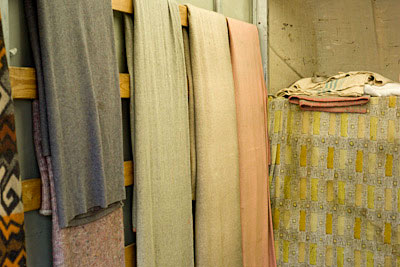
I absolutely love the place. You always feel that there is a hidden gem just waiting to be discovered and I have found a few over the years. This guy doesn’t seem to bother with textiles. I’ve asked him before and he says that linens are usually thrown away or taken to the charity shop. As I was leaving with my new purchase in the back of the car I caught a glimpse in the back of his van, the van he uses to do his house clearance jobs and thought how great all the blankets looked hung on the bars lining the inside. He thought I was mad when I asked if I could climb inside and take some pictures, he hadn’t ever looked at them in that way. As I drove away I realised that the road was lined with wild damson trees covered in fruit, screeched to a halt, parked up pronto and filled a bag with them. What a flippin’ fab day out.
A VERY FINE JAR
Sunday August 16th 2009, 12:31 pm
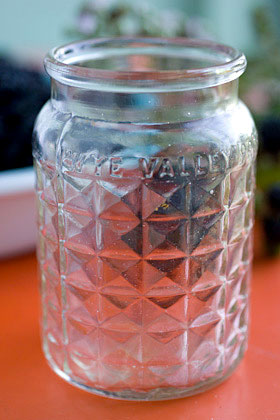
If you find an empty jam jar exciting, you are a very lucky person indeed. It surely means that you can appreciate the simple things in life that make just living a rich experience. Well that’s my theory anyway.
A recent editorial in the Telegraph for The Laundry showed an image of the vintage French Jam jars that I stock in the shop. When you get a bit of publicity like that you realise that you are not alone in your appreciation of the glass jar, as lots of people got in contact keen to get hold of some. (By the way, I sold the ones I had really fast but more are on their way from my French jar hunter, so I’ll be in touch again very soon.)
I’ve been working on how I want my own range of preserves to look, that I intend to sell here at The Laundry. The range will be called Glut Kitchen and I’ve been looking for the right jars and lids to use as well as thinking about the feel that I want the branding to create. This is all before any jam gets made. Once you start thinking in this way you realise the limitations. It isn’t a matter of finding the loveliest jar you can, as you can bet your life it will be far to expensive and impractical to use, making the end price for a jar of jam way over the top.
I thought you might like to see this vintage jar I recently acquired. It isn’t French this time, it’s British. Yes once upon a time we made such things and did a great job of it. Not only does it have a nice faceted pattern around the sides but it says ‘Wye Valley Preserves’ around the rim. The jars I choose for my own range wont be anything like as fancy as this and I doubt that in years to come someone will be waxing lyrical about an old Glut Kitchen jar, but fingers crossed they will remember the taste of the jam it contained.

OLD PEGS
Wednesday July 01st 2009, 10:59 pm
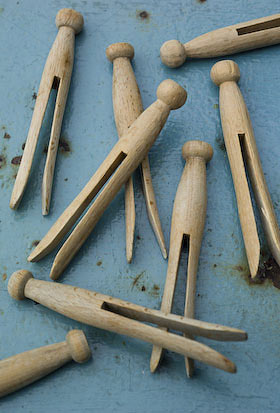
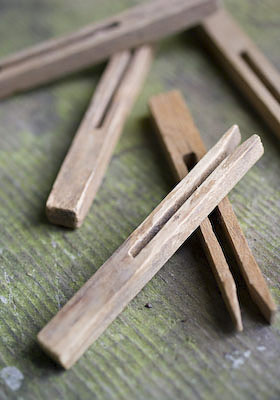
I thought you might like to see these old clothes pegs. With a company called The Laundry it was inevitable that I would acquire some interesting laundry related things over the years. I haven’t set out to collect these things avidly but chancing upon them, I have just picked them up along the way. Old wooden clothes pegs have such a lovely hand-crafted look about them and these ones would most certainly have been hewn out of British timbers, hard enough to stand the test of time and repeated use.
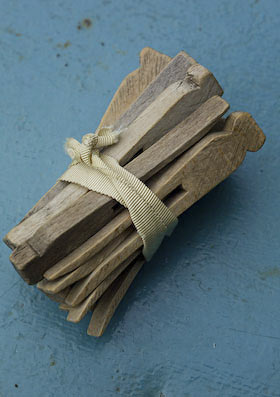
I discovered some of them in an old peg bag found at a car boot sale. You do sometimes find all different shaped pegs jumbled up together and if you are lucky there might be some special examples in amongst the bog-standard ones. The three big chunky pegs were sold to me as blanket pegs and one of them has a few woodworm holes.



THE FLORIBUNDANT LAUNDRY
Friday June 19th 2009, 2:07 pm

The countryside in June is utterly lush. Before leaving home for work this morning I took the opportunity to pick a bunch of flowers from the garden for the shop. I simply cut single stems of one thing, two or three stems of something else, just whatever took my fancy until I’d made up a sizeable bunch. There was no real editing as regards colours with one exception – I still can’t get my head around bright yellow flowers, but apart from instinctively ignoring that part of the spectrum, all other colours were allowed.

I included a few stems of herb robert, that seeds itself everywhere, so can be safely classified as a weed, some comfrey and three lovely scented country roses, filling in the gaps with ladies mantle. So far my arrangement has sparked off several conversations with customers and many admiring comments. Now, not only is the countryside out there rich and verdant, my shops pretty damn floribundant as well. Oh by the way – fabulous flower topped handmade tea cosies, exclusive to The Laundry can be found here.

VINTAGE AND HANDMADE
Wednesday May 27th 2009, 1:05 pm
If you are in the vicinity of Chipping Sodbury this Saturday make sure to call in at The Vintage & Handmade Fair being held in the Town Hall. The Fair is organised by my friend and badge card supplier, Michelle, of the Cowboys and Custard blog and there will be other kindred spirited stallholders selling wonderful things. See this website for more information.


